A ‘World Photography Day’ Special. Register for FREE to view. Besides enumeration of 7 Deadly Sins of Travel Photography, this post also contains a detailed summary, a link to the slide deck, and a link to the full-length video recording of my presentation in TBEX Ostrava, Czech Republic.
7 Deadly Sins of Travel Photography – Why this topic?
TBEX, or Travel Blog Exchange, is the largest global gathering of travel content creators, travel media, and travel industry brands including (but not limited to) Tourism Boards. As a speaker at TBEX, given this diverse audience, I chose a topic that would variously benefit them. For content creators, an awareness of factors that pull down their images is important; and from travel media and travel brands’ perspective, it provides them a yardstick to objectively judge travel/destination images.
7 Deadly Sins of Travel Photography – What do they do to your images?
Any of these 7 sins can degenerate your travel images into travel snapshot. Not a conducive scenario, especially if you make a living, or are hoping to make a living out of your travel stories.

7 Deadly Sins of Travel Photography – What are they?
These sins are:
- Sin of Exposure (< = > ≤ ≥)
Sin of Multiplicity (of Subjects)Sin of Dilution (of visual power)Sin of Division (of focus)Sin of Diffusion (ofstory )Sin of Greed (of unnecessary inclusions)- Sin of Satisfaction (of easy satisfaction)
Let’s look at each of them individually. You may see the presentation below. The full-length video recording of my session is also available beneath the slides.
1. Sin of Exposure (< = > ≤ ≥)
Background
The human eye has a 20-stop dynamic range. But for most present-day cameras, the dynamic range hovers between 9 and 13 stops. In photography, the term – Stop of Light – is used to indicate either halving or doubling the amount of light. To say that a camera has a Dynamic Range (DR) of 10-stops means it can handle the range from X amount of light to 1024X amount of light in a single frame (where X is the darkest and 1024X is the brightest point in that frame). We arrive at this 1024X by simply doubling the X ten times (X, 2X, 4X, 8X…. 1024X).

Even the most competent cameras with a DR of 13-stops can only handle a range of light from X to 8192X. In comparison, this DR of the
Our eyes are able to see the darkest and the brightest part of the scene vividly, while the camera struggles to do justice to this wide range of reflected light in a frame. Little wonder the images clicked by camera in high dynamic range situations fail to come close to what we see with our eyes.
BTW, I had stayed away from providing this technical mumbo-jumbo in my talk because of limited time.

Result
When we shoot, we sometimes end up either underexposing or overexposing the frame. Both

Now what?
While shooting, we need to consider this technical limitation of cameras and accordingly act. If the scene is too bright, we should underexpose and consider bringing out the dark area details in post-processing. Accordingly, if the scene is too dark, we need to over-expose the frame a bit, so the dark area details are not totally lost. Recovery of such details can be done during processing (see examples below). For a post-processing tutorial, head over to ‘Using Lightroom – A Simple Workflow’.

Deliberate underexposure… 
…corrected in processing

Deliberate underexposure… 
…corrected in processing
How to of avoiding the ‘Sin of Exposure’
- Keep an eye on the exposure meter (you’d find it at the bottom of your viewfinder; in case you don’t see it, go to your camera’s menu and enable it) before you press the trigger
- While you may keep your histogram switched off when you shoot, keep it switched on in review mode. This will help you in assessing if the frame has been properly exposed. A histogram bunched to the left means underexposure and a histogram bunched to the right means overexposure. Ideal histogram of a perfectly exposed frame would be in the middle and will be like a standard ‘bell curve’ (see Bell Curve definition HERE). If the frame is not perfectly exposed, go on… change the camera settings, and click a few more.

Metering scale 
Histogram
Exceptions
There are times when you will need to deliberately under or overexpose a frame. Here are a few examples of such situations.
Deliberate Underexposure (When you need silhouettes)


Deliberate Overexposure (When the subject is in relative darkness)


2. Sin of Multiplicity (of Subjects)
This sin confuses the viewer. Indulging in this sin doesn’t help him in figuring out what he should be looking at. Here are some examples of images guilty of this sin, and the images that aren’t.
Guilty


Not Guilty


How to of avoiding the ‘Sin of Multiplicity’
- Pause and consider what is going to be your subject
- And then, sacrifice the rest to make your subject the hero
3. Sin of Dilution (of Visual Power)
When you shoot during your travels, the frames will be dynamic. Elements in the frame will constantly move. Well, mostly. What is finally there in the frame will depend on your pressing of the trigger at the decisive moment. All this cannot be always planned. In such a scenario, your best bet is to hedge your bets. So, what you need to do?

Non-subject dilutes… 
No such dilution here
How to of avoiding the ‘Sin of Dilution’
- Shoot multiple shots
- Keep the ‘Depth of Field’ shallow
- Ensure the non-subjects are focussing on your subject
- Keep the frame tight, cutting out the extraneous elements
- Post process (e.g. darkening the non-subjects, etc.)

4. Sin of Division (of Focus)
Inadvertently, there are times when your photographs have a divided focus. Its composition takes away from emphatically delivering the subject in all its glory. Such situations are tricky and require all your faculties to fire together for a fair assessment. Avoiding this sin is the most difficult to master. I hope the examples below will help you understand it and save you from falling

Where will your eye go? 
Again, where will your eye go?

How to of avoiding the ‘Sin of Division’
- Be mindful of other elements
- Shoot bursts if other elements are likely to affect your frame
- Compose your subject to make it the most prominent
5. Sin of Diffusion (of Story)
As a photographer, you face a challenge. You have to capture frames that tell a story. At times, the story gets diffused. It may happen due to lack of balance, harmony or fluidity that guides the viewer’s eyes. It could be because the subject is too small. It may happen because of cluttered surroundings. The examples below will help you understand this issue clearly. Whatever the reason, you need to work hard to get around it.

Diffusion of story 
No diffusion

Diffusion of story 
No diffusion

How to of avoiding the ‘Sin of Diffusion’
- Shoot multiple shots
- Experiment. Use techniques (e.g. panning, zoom-burst, etc. – For an understanding of zoom-burst, click Zoom Burst Photography)
- Crop
- Be mindful of the unfolding of the story and its various characters
6. Sin of Greed (of Unnecessary Inclusions)
All photographers succumb to this sin more often than not. The urge to include other available attractive elements in your frame is inherent human nature after all. In the examples below, you’ll see how the sin of greed adversely

Greed… 
No greed!

Greed… 
No greed!

Greed… 
No greed!
But then, there are times when greed is good. Have a look at these examples that extol the virtues of greed at those rare times.

How to of avoiding ‘Sin of Greed’
- Be clear about what is your subject
- Be vigilant about distractions – especially around the corners and edges of the frame
- Mercilessly exclude them by forcefully suppressing the urge to include them
7. Sin of Satisfaction (of Easy Satisfaction)
At times, we get impatient and want to just walk off as soon as we have clicked a photograph saying ‘I have got my shot; I am out of here!’. Most, nay, all of us have been guilty of falling prey to it sometime or the other. While the shot you may have already captured may be decent, easy satisfaction may lead to your missing out on some nicer ones. Check out the sets of images below to see how ‘easy satisfaction’ could have deprived me of capturing some extraordinary stories.

If satisfied with this… 
I’d have missed out on this!

If satisfied with this… 
I’d have missed out on this!

If satisfied with this… 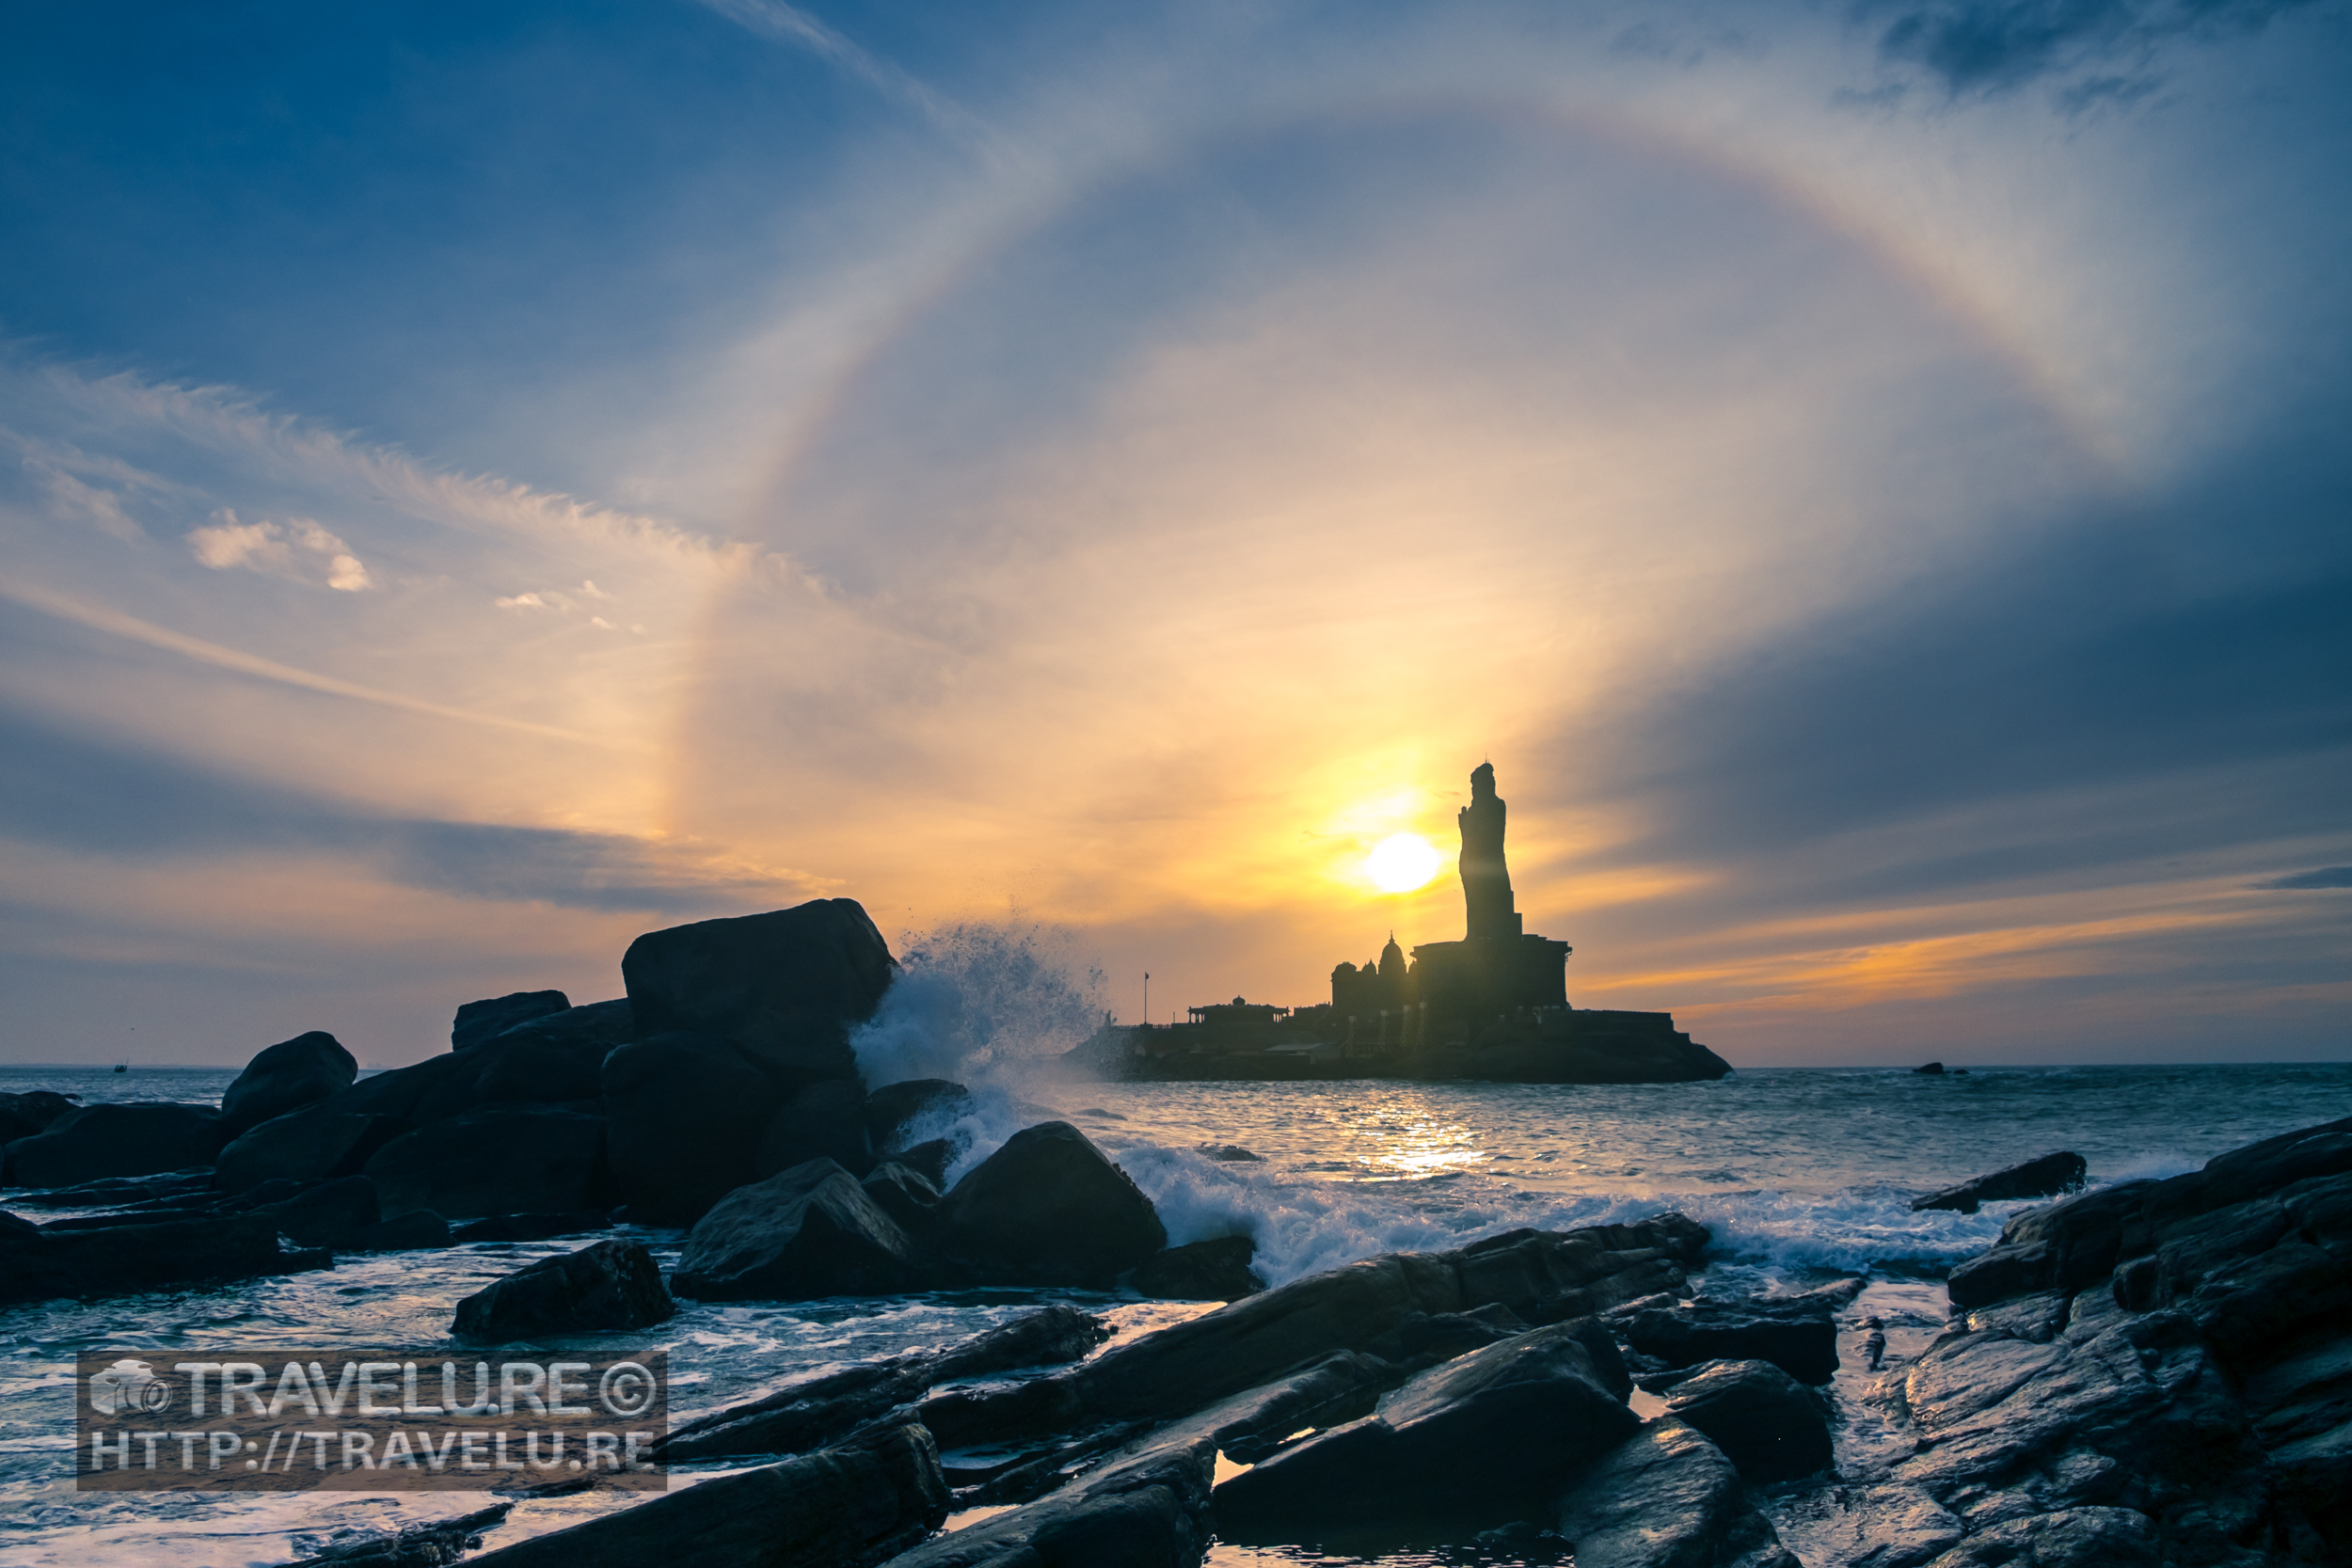
I’d have missed out on this!
How to of avoiding ‘Sin of Satisfaction’
- Be critical of the frames you shoot
- Never pack your camera while you are out shooting
- Keep trying different POVs, different compositions. Basically, work the scene.
Wish to receive more tips and stories in your inbox? Subscribe Here.
Like it? Share it! In case you have any queries, please email me at travelure@travelure.in


